

Not all data science enthusiasts are lucky enough to have a machine that has the power to handle all kinds of data. Thanks to cloud services the only thing that would stop us now is connectivity, which is pretty decent nowadays. So let us exploit all the free resources to learn and prosper before getting our own hyper machine which obviously doesn’t come or say never comes anywhere near cheap.
Here in this article, you will learn to set up an AWS(Amazon Web Services) EC2 instance and configure it to serve as a Jupyter Notebook server which is totally free of cost.
Creating An AWS EC2 Instance
Head to https://aws.amazon.com/ and create your AWS account. Once you are done with that go to the AWS Management Console and Sign in with your credentials.
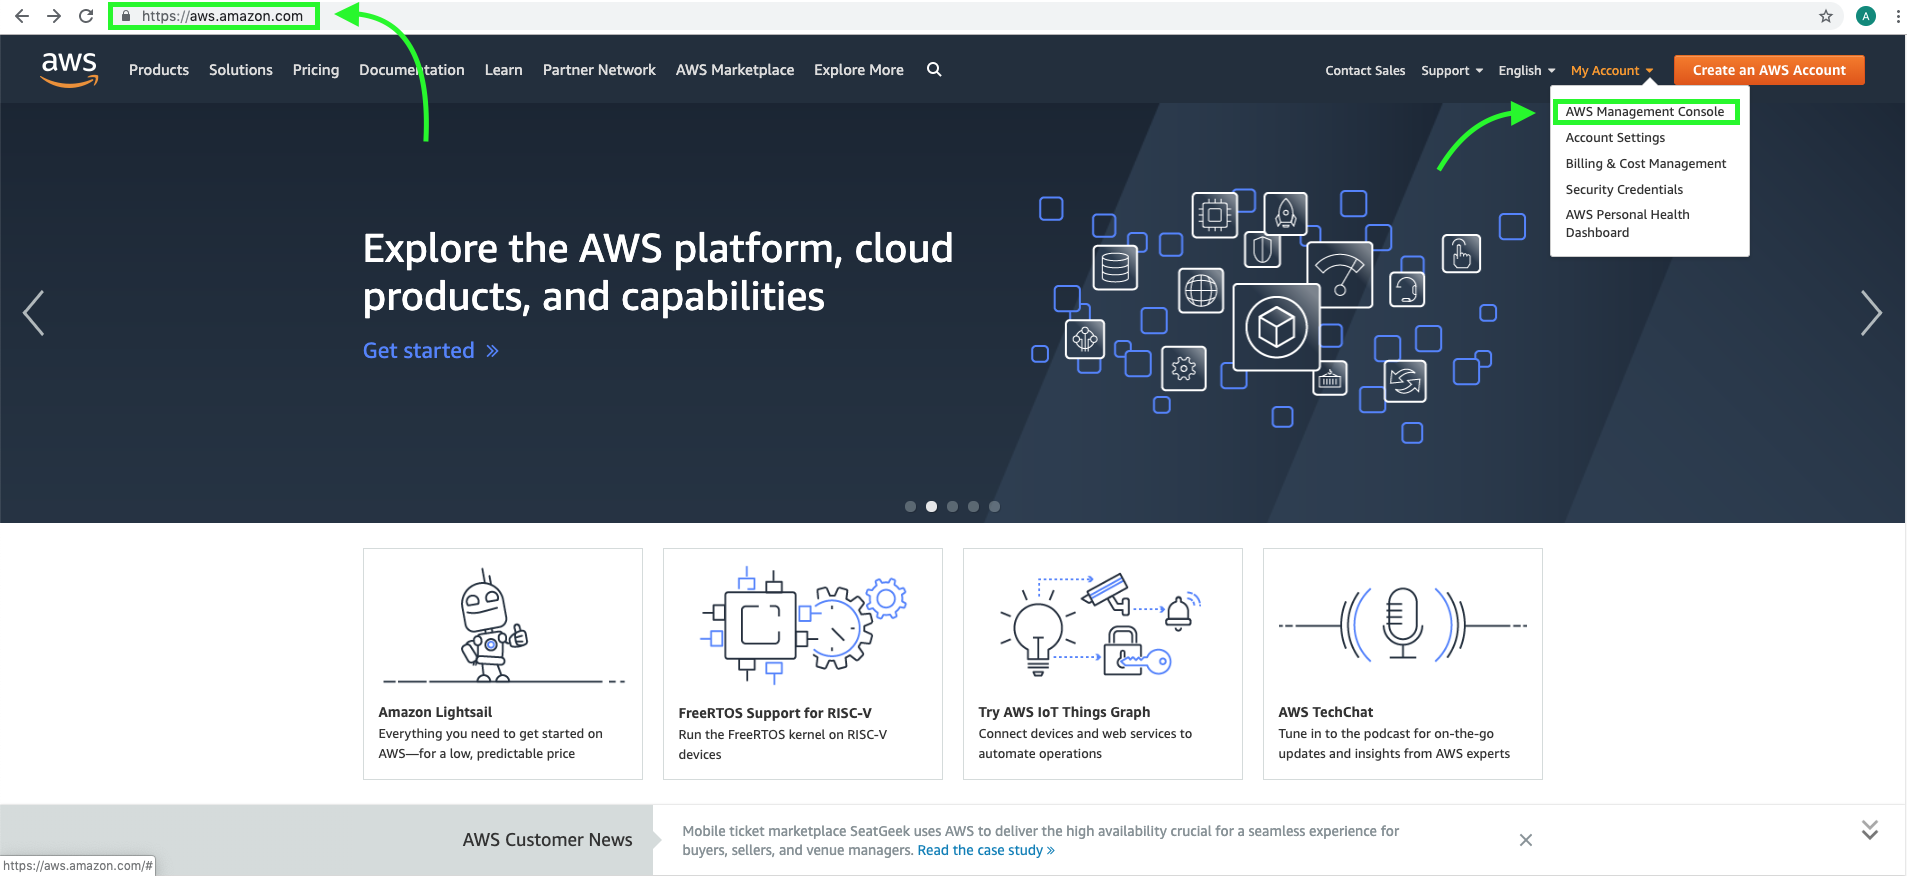
Once you are logged in, go to the services section and select EC2.

Click on the launch instance button and on the upcoming page select a suitable environment for the server.
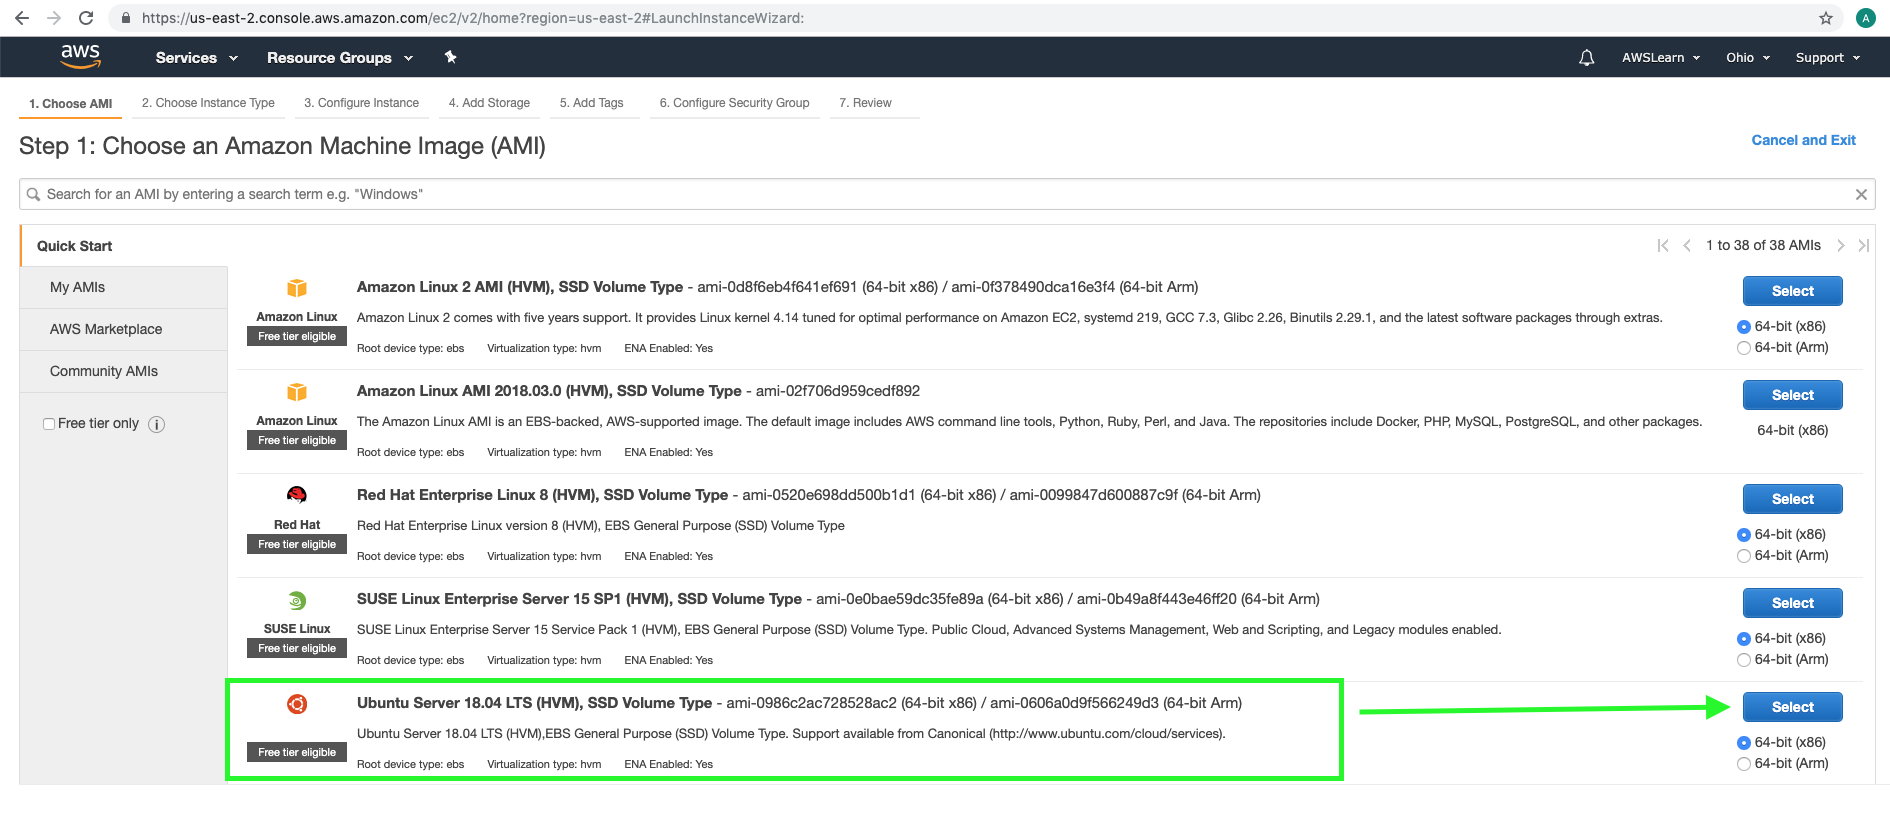
Choose the instance type. AWS is extremely scalable and we can do that on demand. We will stick to the free tier instance which does not charge for its service. Select the free tier service and click Next to proceed.

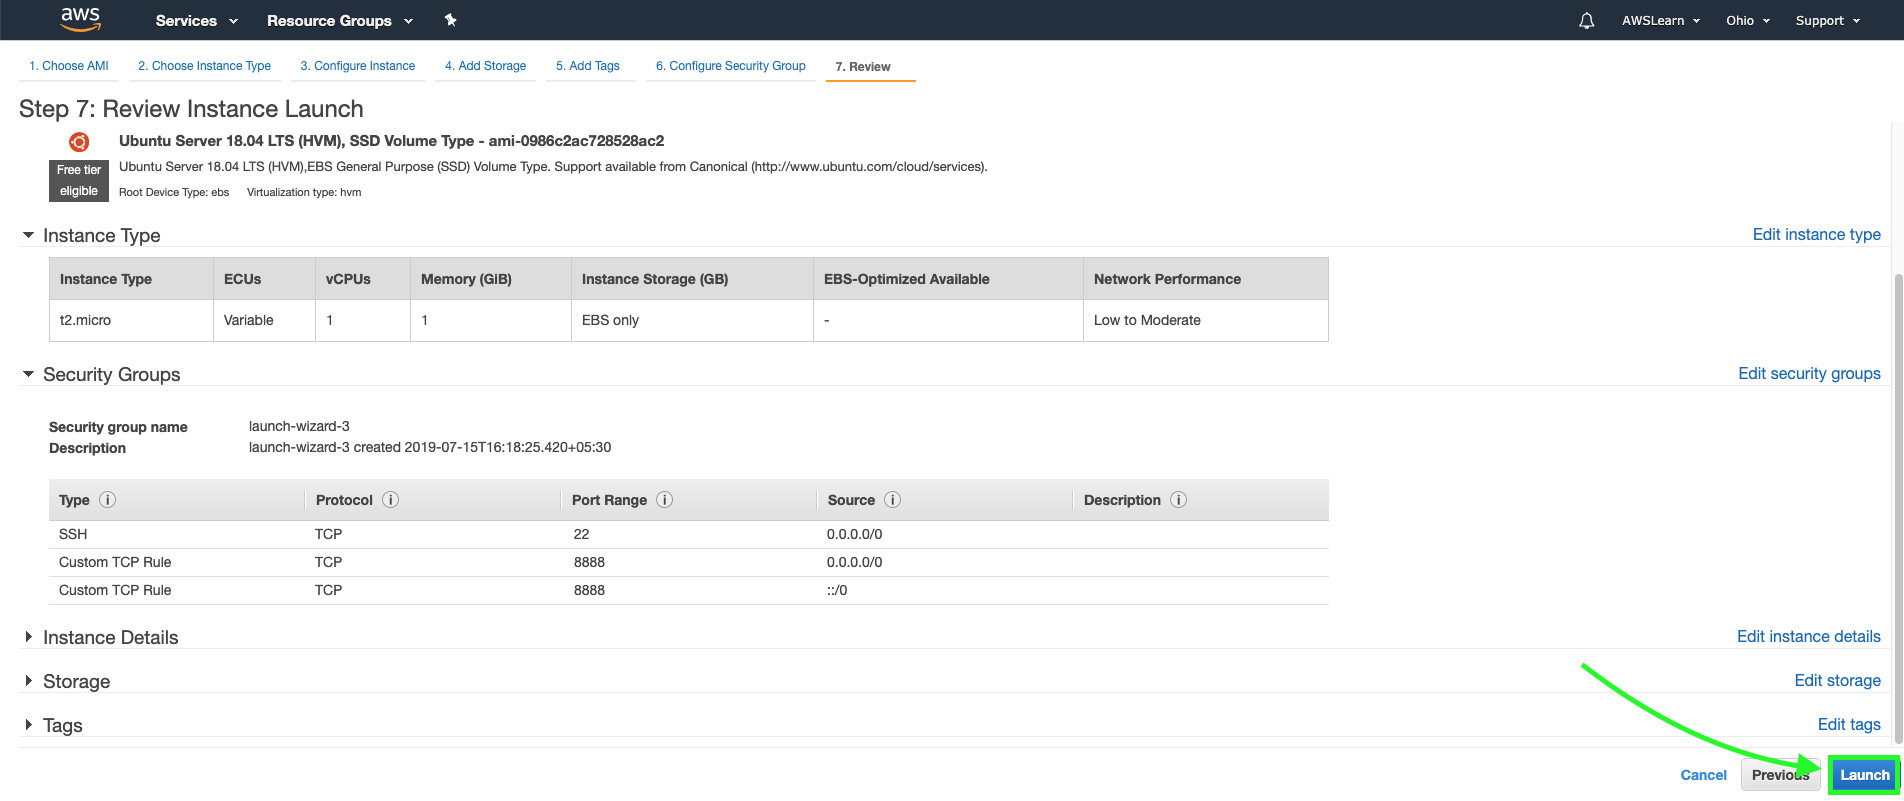
Stick to the defaults in the Configure Instance tab and the Add Storage tab and move on to Configure Security Groups tab. Add a new Custom TCP rule which would allow us to connect to the Jupyter Notebook over https. You can choose to put a different name to the security group if you wish to.

Click Review and Launch to move to the Review page. Click the launch button
You will be prompted to select or create a key pair. Create a new key pair and download it to your system. This key is required to connect to the EC2 instance.

Once you click Launch Instances button as in the above image, you will be taken to the Launch Status page. Click on the instance id.

You will now be able to see your running instances on the instances page.

Change the file permission of the downloaded security key in your pc and move it to a secure location(In Unix based OS – ‘Users/username/.ssh/’).
chmod 400 aws_ec2_security.pem
mv Downloads/aws_ec2_security.pem Users/username/.ssh/
Connecting to the EC2 Instance.
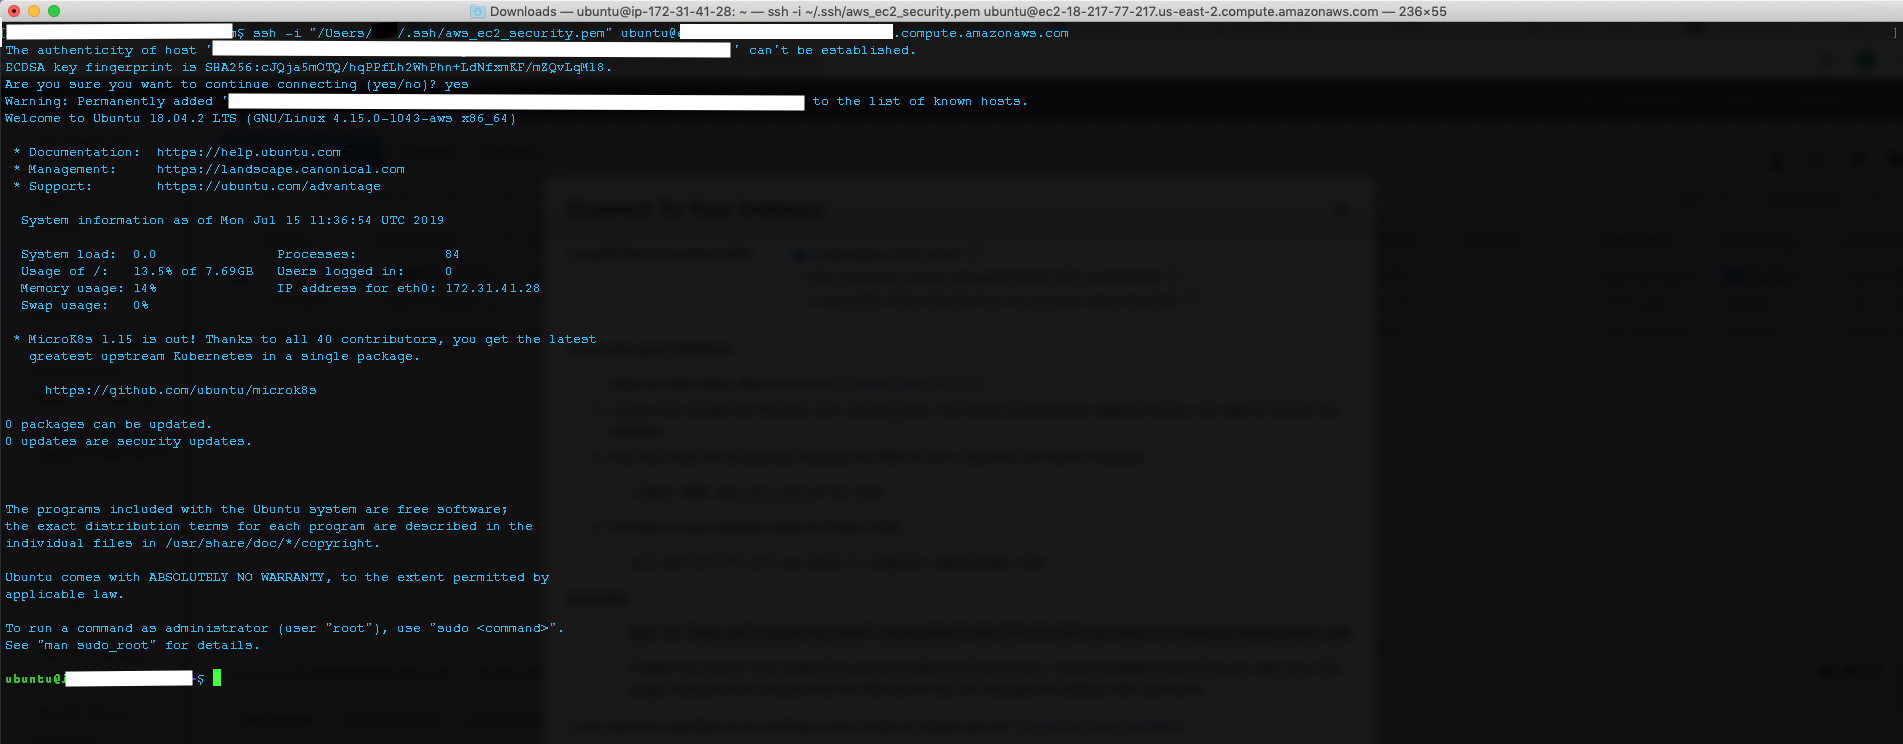
Go to the instances page as shown in step 8. Select the running instance by clicking on it and click on the Connect button on top. Copy the ssh command to connect. Update the location of the security key in the command and enter it in the terminal to connect to the EC2 instance.
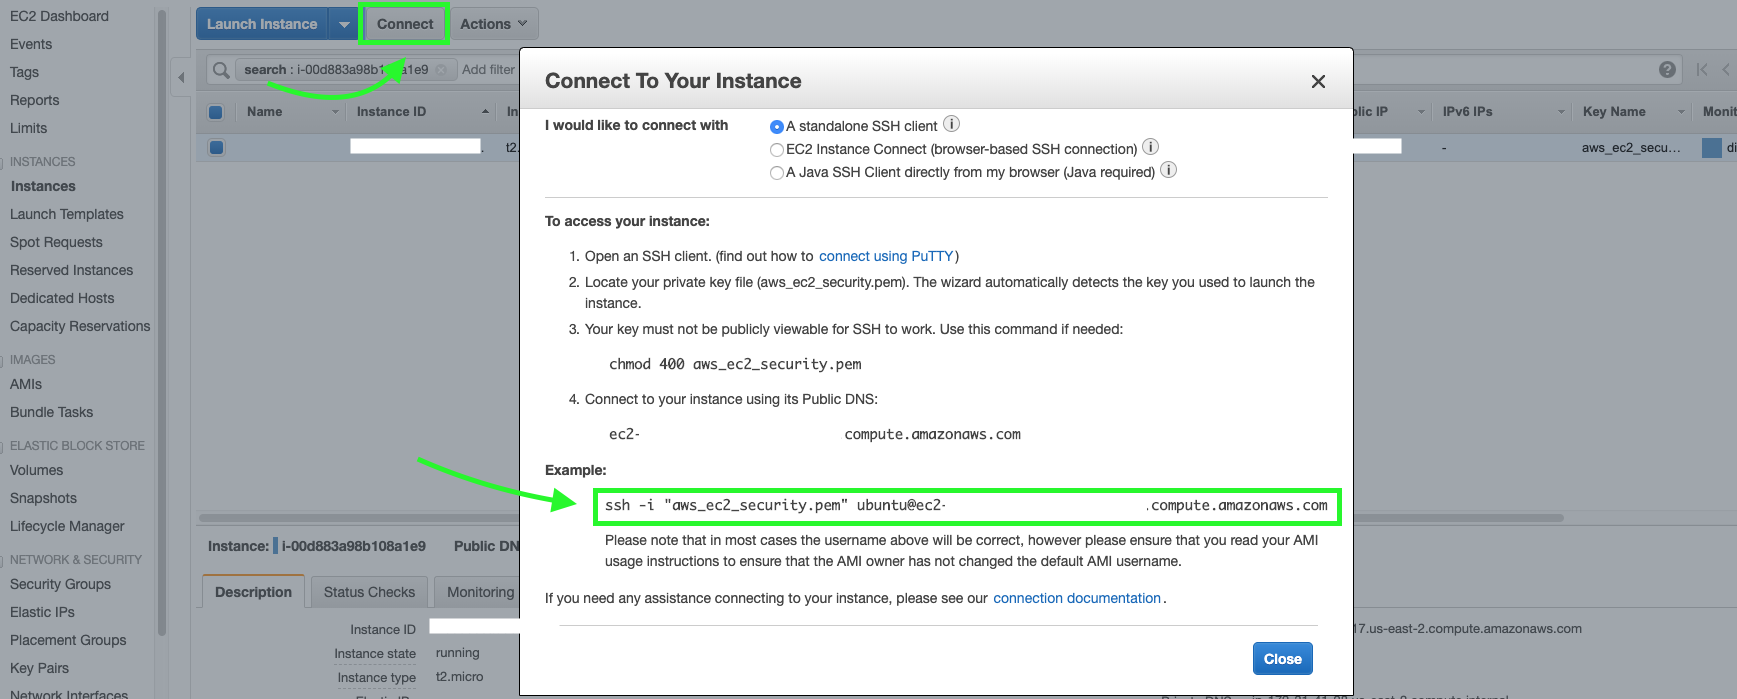
Go to the terminal and type the following to connect. Make sure to use your public DNS and security file (the location should be updated)
ssh -i "Users/username/.ssh/aws_ec2_security.pem" ubuntu@ec2-ip.us-east-2.compute.amazonaws.com
Note:
Windows users can use the PowerShell or putty to connect to the EC2 instance.
Downloading the Anaconda Distribution
Now that we have a Linux Machine, it’s time to set up our Data Science environment. Thanks to anaconda everything that we need comes in a packed environment. We will download the Anaconda distribution which is a complete python environment packed with all necessary packages, libraries and tools like Jupyter notebook, Ipython etc.
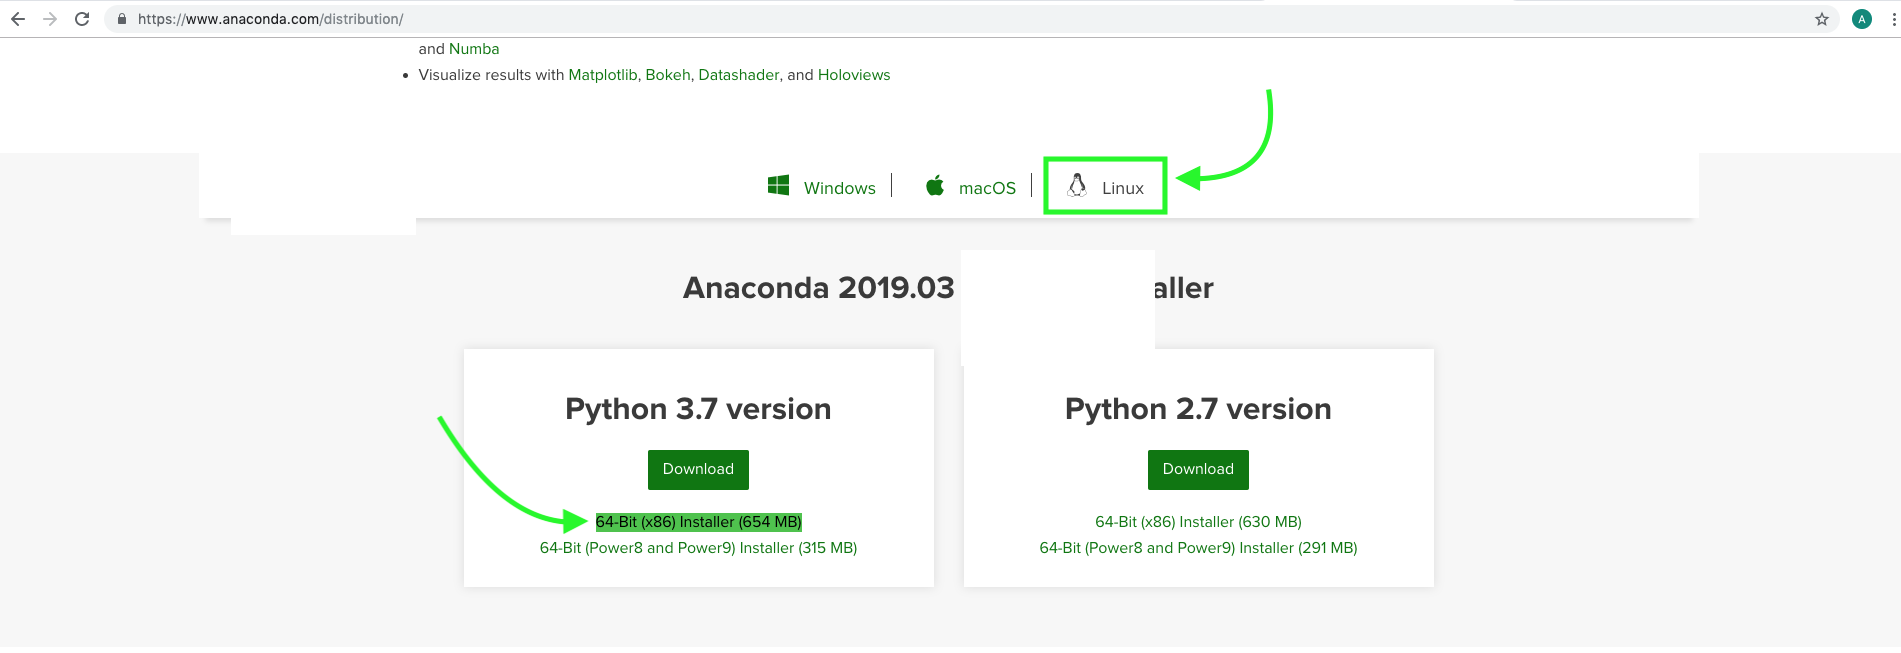
Head to https://www.anaconda.com/distribution/, select the Linux installer, right-click and copy the link address of the 64-Bit (x86) Installer (654 MB) installer. See the image below:
Once you copy the link, go back to the EC2 instance terminal. Create a temporary folder called Downloads. Change your directory into the Downloads folder.
mkdir Downloads
cd Downloads
Type the following command. (Use the link you copied)
wget https://repo.anaconda.com/archive/Anaconda3-2019.03-Linux-x86_64.sh
This will download the installer into your AWS EC2 instance’s Download directory.

Installing the Anaconda Distribution
Use the bash command to unpack the shell installer and start the installation, when prompted press Enter to proceed with the installation. Read the Terms and conditions and type yes to proceed.
bash Anaconda3-2019.03-Linux-x86_64.sh
Once you type in yes it will ask for a preferred location to install Anaconda. Proceed with the default location or change to the desired location. Press enter and wait for the installation to complete.

Once the installation is finished you will be asked if you wish the installer to initialize Anaconda3 by running conda init. Type in yes and complete the installation.

Congrats Anaconda Distribution has been installed in your AWS instance!
To check if your default python is from anaconda, type in :
which python
If you get the following result you are good to go.
![]()
Otherwise manually set in the path by entering the following on your terminal.
export PATH=/home/ubuntu/anaconda3/bin:$PATH
You will now be set to the right python environment which is Anaconda.
You can check the version of python to confirm that it is the same as the anaconda version of python that you downloaded. Type in python at the terminal to log in to the interactive python.You will see the following information if you are in the right environment
Python 3.7.3 (default, Mar 27 2019, 22:11:17)
[GCC 7.3.0] :: Anaconda, Inc. on linux
Type “help”, “copyright”, “credits” or “license” for more information.
Setting Up Jupyter Notebook
After installing Anaconda, we now have all the things we need in our machine including Jupyter Notebook. But before spinning it up we need to configure it for the server.
Setting Encrypted Password for Jupyter
Go back to the terminal and open up the python interactive shell by typing python
Use the following code block to generate an encrypted password.
from IPython.lib import passwd
passwd()
Copy the encrypted password and also remember the password you typed in as you will need it to log in to the Jupyter Notebook

Securing the Server with SSL certificate
Since our server will be open to the web, we will use OpenSSL to add an SSL certification to act as an added security layer.
Type in the following command.
sudo openssl req -x509 -nodes -days 365 -newkey rsa:2048 -keyout ssl_cert.pem -out ssl_cert.pem
Fill in the details when prompted. This will create a file named ssl_cert.pem at your working directory.
Change the ownership of the file to prevent permission errors. Execute the following command.
sudo chown $USER:$USER ssl_cert.pem
Configuring Jupyter Notebook
Type in the following command to generate a configuration file for Jupyter Notebook.
jupyter notebook --generate-config
The above command will create a configuration file at /home/ubuntu/.jupyter/jupyter_notebook_config.py by default.
To edit the configuration file type and enter :
vim ~/.jupyter/jupyter_notebook_config.py
Edit the configuration file to add the following lines of code.
c = get_config()
#Kernel config
c.IPKernelApp.pylab = 'inline' #Enables plotting support by default
#Notebook config
c.NotebookApp.certfile = u'/home/ubuntu/ssl_cert.pem' #location of your certificate file
c.NotebookApp.ip = '0.0.0.0'
c.NotebookApp.open_browser = False #Setting it to False will not let the Notebook attempt to open up in a native browser.(AWS server has no browsers or GUI)
c.NotebookApp.password = u'sha1:5093985f5d96:84cd6ecedf03d4a281ca30ceef123faabf4d7e99' #The encrypted password to log in to jupyter notebook
#Setting the default port for Jupyter Notebook
c.NotebookApp.port = 8888
Important Note:
Remember to replace c.NotebookApp.password value with the password you generated before. Also, set the right path to the ssl_cert.pem file.
Save and exit the file.
Running the Jupyter Notebook
That’s it. Now our Jupyter server is completely ready. All we need to do is spin it up.
Type in the command screen to make a new separate command-line interface. Press enter and you will have a new separate screen on which we will run the Jupyter Notebook.
Make a new directory to put all your notebooks. Move into the directory and start the Jupyter notebook using the following commands.
mkdir Workspace
cd Workspace
Type and enter jupyter notebook to start the notebook server. Once it is started you can see the logging.
To go back to the other screen – press ctrl + a and then press d on the keyboard.
To again reattach to the Jypyter log screen type in and enter screen -r on the same terminal. screen -ls will display all the active screens you have opened.
Accessing the Jupyter Notebook Remotely
Copy the public DNS of your AWS EC2 instance from your AWS console. It will be similar to the one shown below:
ec2-13-128-70-55.us-east-1.compute.amazonaws.com
Prepend https:// and append the port number on which the jupyter notebook is running on the server as shown below.
https://ec2-13-128-70-55.us-east-1.compute.amazonaws.com:8888
Open up your favourite browser and enter the url.

Login with your password and enjoy coding.

Now you have a complete and dedicated Data Science Environment. Happy coding !!